In this post, I’m going to go through the steps I actioned to enable Remote Desktop Access using Intune for devices that are Azure joined. We need to create a few configurations within Intune to get this setup.
- Security Group
- Enabling Remote Desktop Access
- Adding Users in the Local Group – Remote Desktop Users
- Firewall Rule
- Adding the DNS Suffix
- Creating the RDP File
- Connecting
Security Group
I first created a security group called Allow RDP Access, then I can add users into this group when access has been approved (this is optional).
Enabling Remote Desktop Access
Via the Intune Admin Portal > Devices > Windows > Configuration > Create > New Policy.
Platform: Windows 10 and later.
Profile Type: Settings Catalog.
Basics
Name: Give it an appropriate name.
Description: Add a description if you wish.
Configuration Settings
Click on + Add Settings and search for Allow users to connect remotely by using Remote Desktop Services.

The setting is set to DISABLED by default. Change to Enable > Next.
Scope tags: Leave blank and Next.
Assignment: I added my security group.
Adding Users in the Local Group – Remote Desktop Users
This can either be done manually on the device itself or you can create an Account Protection policy, Intune Admin Portal > Endpoint Security > Account Protection > Create Policy.
Platform: Windows
Profile: Local user group membership > Create.
Name: Give it an appropriate name.
Description: Add a description if you wish > Next.
Configuration Settings
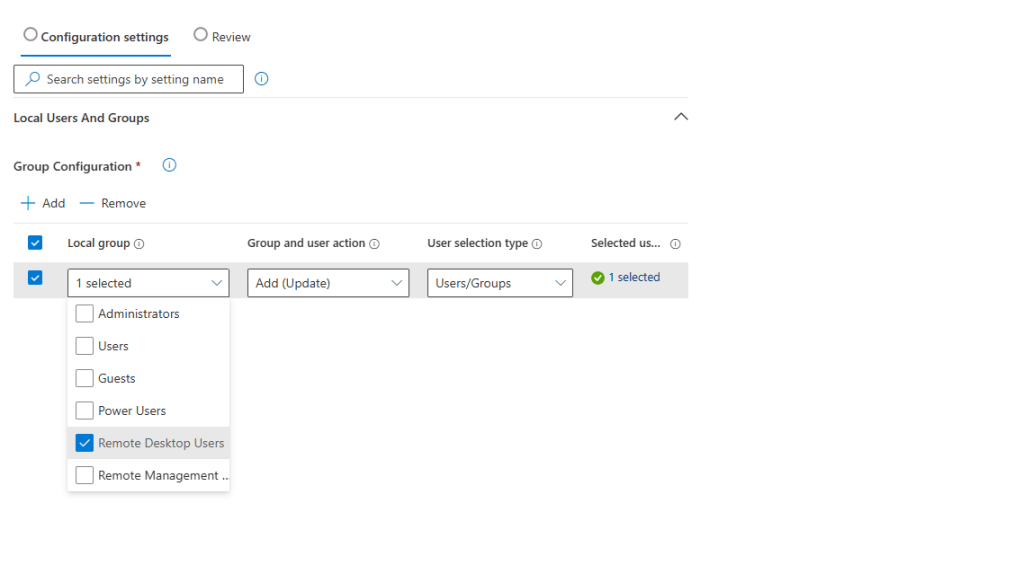
Group Configuration > Add
Local Group: Remote Desktop Users
Group and user action: Add (Update)
User selection type: Users/Groups
Select user(s): I added my admin user.
Scope tags: Blank
Assignment: I added my security group.
Firewall Rule
You need to make sure RDP Port 3398 is Allowed for Inbound Connection. Now, I use Defender for Endpoint, allowing me to create a Firewall Rule within Intune, however, there are Anti-Viruses out there that put their own Firewall solution on the machine. Intune Admin Portal > Endpoint Security > Firewall > Create Policy.
Platform: Windows
Profile: Windows Firewall Rules
Name: Give it an appropriate name.
Description: Add a description if you wish > Next.
Configuration Settings
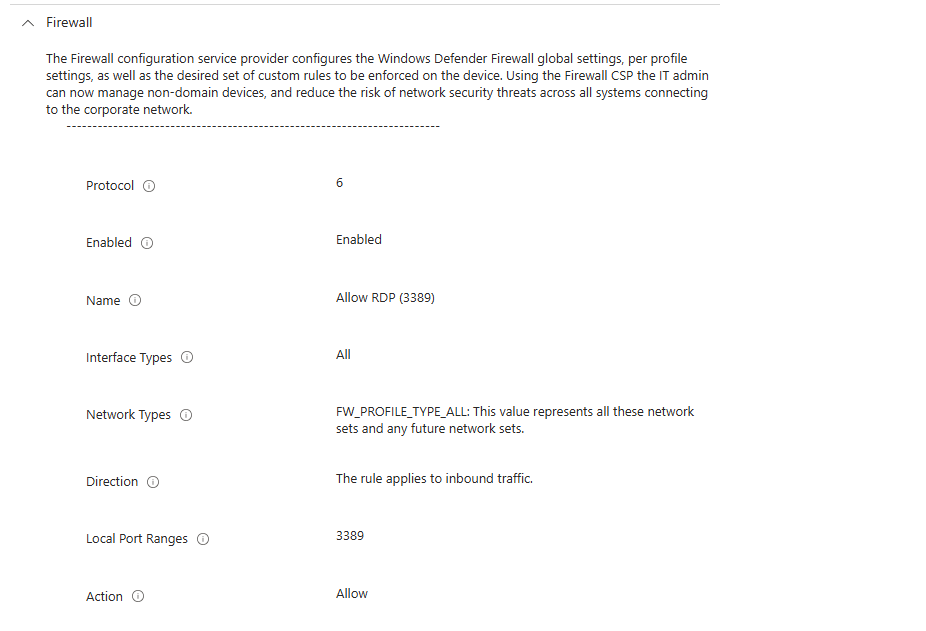
Name: Give it an appropriate name.
Action: Allow
Additonal Settings: Edit Instance
Edit Instance
Enabled: Enabled
Interface Types: All
Network Types: FW_PROFILE_TYPE_ALL
Local Port: 3389
Protocol: 6 (which is TCP)
Scope tags: Blank
Assignments: I added my security group.
Adding the DNS Suffix
On the computer you wish to remote in, you need to make a slight change the computer name, Settings > System > About > Advanced System Settings > Computer Name > Change > More;
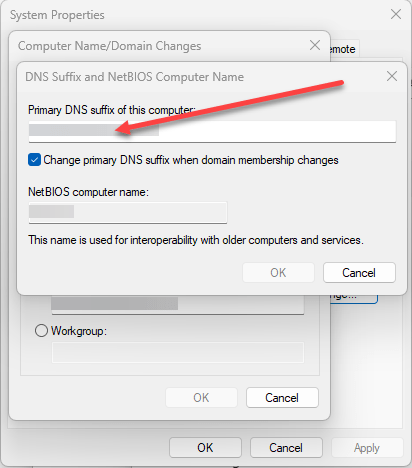
In here, you need to insert your domain name. So for me, it would be lrs-computers.co.uk – you don’t need to include the @ symbol at the start.
Once added, restart the machine.
Creating the RDP File
Open Notepad and insert the following;
enablecredsspsupport:i:0
authentication level:i:2
enablerdsaadauth:i:1
Save the file as a .rdp file, example connection.rdp
Connecting
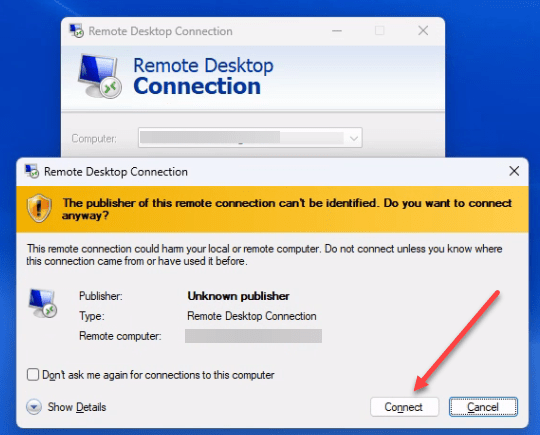
Double-click the .RDP file you’ve created and insert the Device Name with the FQDN (not IP Address), for example;
Computer: PC2.lrs-computers.co.uk > Connect > Ignore the warning > Connect
Now it will ask you to sign in with your M365 account –
If you have entered your credentials correctly, it should take you into the remote PC.
